Dried Scabiosa, known for its delicate and intricate blooms, offers a versatile medium for a variety of DIY projects. Whether you’re looking to create a stunning wreath, captivating wall art, or other decorative items, dried Scabiosa’s unique texture and beauty make it an excellent choice. This comprehensive guide explores detailed DIY projects using dried Scabiosa, providing step-by-step instructions, design tips, and creative ideas to enhance your home décor.
1. Understanding Dried Scabiosa
1.1 Botanical Overview
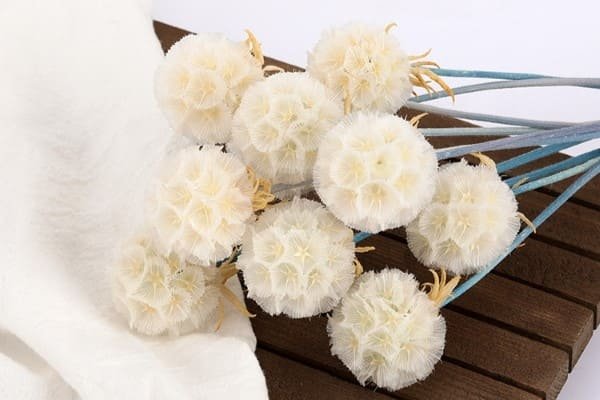
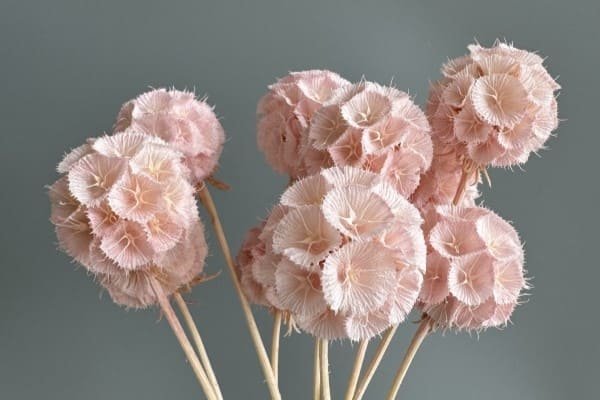
Scabiosa, also known as Pincushion Flower, belongs to the Dipsacaceae family. It features spherical flower heads with a pincushion-like appearance, making it a favorite in both fresh and dried floral arrangements. When dried, Scabiosa retains its structure and intricate details, adding an elegant touch to various projects.
1.2 Characteristics of Dried Scabiosa
- Shape: The spherical shape of the flower head provides a unique focal point in any arrangement.
- Texture: Dried Scabiosa has a slightly papery texture that adds dimension to projects.
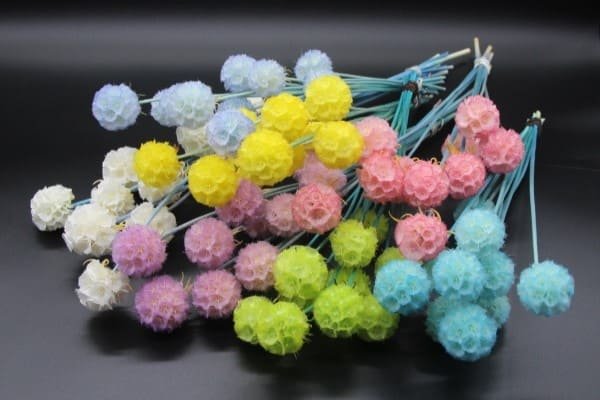
- Color: Available in a range of colors including soft pinks, purples, and whites, dried Scabiosa maintains its hue even after drying.
2. DIY Projects with Dried Scabiosa
2.1 Scabiosa Wreaths
2.1.1 Materials Needed
- Dried Scabiosa blooms
- Wreath base (wire or foam)
- Hot glue gun and glue sticks
- Floral wire
- Greenery (optional)
- Scissors or wire cutters
2.1.2 Instructions
- Prepare the Wreath Base: Start with a wreath base of your choice. Wire bases provide flexibility, while foam bases offer a solid structure for attaching flowers.
- Arrange the Scabiosa: Lay out the dried Scabiosa on the wreath base to determine the placement. Arrange them in a pattern that pleases you, considering both the color and shape.
- Attach the Scabiosa: Using a hot glue gun, secure each Scabiosa bloom to the wreath base. Apply glue to the flower stem and press it firmly onto the base.
- Add Greenery: For added texture and contrast, include greenery or other dried elements. Secure these in place with hot glue or floral wire.
- Finish the Wreath: Once all flowers and greenery are attached, check for any gaps and fill them in with additional Scabiosa or filler elements. Allow the glue to dry completely.
- Hang the Wreath: Attach a ribbon or hanging mechanism to the top of the wreath. Hang it on a door, wall, or other prominent location.
2.2 Scabiosa Wall Art
2.2.1 Materials Needed
- Dried Scabiosa blooms
- Picture frame (with or without glass)
- Floral foam or canvas board
- Hot glue gun and glue sticks
- Wire cutters
- Optional: paint or background fabric
2.2.2 Instructions
- Prepare the Frame or Board: Choose a frame or canvas board as the base for your wall art. If using a frame, you may need to remove the glass to accommodate the flowers.
- Create the Background: Optionally, paint or cover the canvas board with fabric to complement the Scabiosa. This will serve as the backdrop for your floral arrangement.
- Attach the Floral Foam: If using floral foam, cut it to fit the frame or board. Secure it with glue or tape. The foam will act as the base for attaching the Scabiosa.
- Arrange the Scabiosa: Plan the arrangement of Scabiosa blooms on the foam or canvas. Experiment with different patterns and placements.
- Secure the Scabiosa: Use a hot glue gun to attach each Scabiosa bloom to the foam or canvas. Press firmly to ensure a secure attachment.
- Finish and Frame: Once all flowers are attached, trim any excess floral foam and place the completed arrangement into the frame. If using a canvas, simply hang it as-is.
2.3 Scabiosa Table Centerpieces
2.3.1 Materials Needed
- Dried Scabiosa blooms
- Vase or container (glass, ceramic, or metal)
- Floral foam or decorative stones
- Hot glue gun and glue sticks
- Optional: additional dried flowers or greenery
2.3.2 Instructions
- Prepare the Container: Choose a vase or container that complements your décor. Ensure it is clean and dry.
- Prepare the Base: Fill the bottom of the vase with floral foam or decorative stones. This will help support the Scabiosa and keep it in place.
- Arrange the Scabiosa: Place the Scabiosa blooms into the vase, arranging them as desired. Consider the height and distribution of the flowers.
- Secure the Flowers: Use a hot glue gun to secure the Scabiosa in place if needed. For added stability, insert the stems into the floral foam or use additional decorative elements.
- Add Extra Touches: Enhance the centerpiece with additional dried flowers, greenery, or decorative elements to create a balanced and cohesive arrangement.
- Display: Place the completed centerpiece on your table, mantel, or any prominent location.
2.4 Scabiosa Garland
2.4.1 Materials Needed
- Dried Scabiosa blooms
- Floral wire or string
- Hot glue gun and glue sticks
- Wire cutters
- Optional: additional dried flowers or foliage
2.4.2 Instructions
- Prepare the Wire: Cut a length of floral wire or string to the desired length for your garland.
- Arrange the Scabiosa: Lay out the Scabiosa blooms on the wire, planning the spacing and arrangement.
- Attach the Flowers: Use a hot glue gun to secure each Scabiosa bloom to the wire or string. Ensure they are evenly spaced and securely attached.
- Add Additional Elements: For added texture and visual interest, incorporate other dried flowers or foliage into the garland.
- Finish and Hang: Once all elements are attached, trim any excess wire or string. Hang the garland as a decorative element on walls, mantels, or doorways.
2.5 Scabiosa in DIY Frames
2.5.1 Materials Needed
- Dried Scabiosa blooms
- Shadow box or deep frame
- Backing material (cardstock or fabric)
- Hot glue gun and glue sticks
- Optional: additional decorative elements
2.5.2 Instructions
- Prepare the Frame: Choose a shadow box or deep frame that allows space for the flowers to sit flush against the glass.
- Prepare the Backing: Cut a piece of cardstock or fabric to fit the frame. This will serve as the background for the Scabiosa.
- Arrange the Scabiosa: Lay out the dried Scabiosa on the backing material, experimenting with different arrangements.
- Secure the Flowers: Use a hot glue gun to attach the Scabiosa to the backing material. Ensure they are securely attached and well-positioned.
- Assemble the Frame: Place the backing with the attached Scabiosa into the frame. Secure the back of the frame and hang it on a wall.
2.6 Scabiosa in Decorative Jars
2.6.1 Materials Needed
- Dried Scabiosa blooms
- Decorative jars or bottles
- Hot glue gun and glue sticks
- Optional: decorative fillers (e.g., sand, pebbles)
2.6.2 Instructions
- Prepare the Jar: Clean and dry the decorative jar or bottle.
- Arrange the Scabiosa: Place the dried Scabiosa inside the jar, arranging them to your liking. Consider using decorative fillers to support the flowers.
- Secure the Flowers: If needed, use a hot glue gun to secure the Scabiosa in place. This will help keep them from shifting within the jar.
- Finish the Decoration: Add any additional decorative elements or fillers to enhance the look. Close the jar and display it as a decorative piece.
3. Design Tips and Considerations
3.1 Choosing the Right Scabiosa
- Color Coordination: Select Scabiosa blooms that complement the color scheme of your project.
- Size and Shape: Consider the size and shape of the Scabiosa in relation to the overall design.
3.2 Arranging Techniques
- Layering: Layer different elements to add depth and texture to your project.
- Balance: Ensure a balanced distribution of flowers and other elements to create a cohesive look.
3.3 Maintenance and Care
- Dusting: Gently dust dried Scabiosa to keep it looking fresh.
- Avoid Moisture: Keep dried Scabiosa away from moisture to prevent damage and deterioration.
4. Advanced DIY Techniques with Dried Scabiosa
4.1 Pressed Scabiosa Art
4.1.1 Materials Needed
- Dried Scabiosa blooms
- Flower press or heavy books
- Acid-free paper
- Frame or shadow box
- Hot glue gun (optional)
4.1.2 Instructions
- Press the Flowers: Place the dried Scabiosa blooms between sheets of acid-free paper. Use a flower press or heavy books to flatten and dry them further.
- Prepare the Backing: Cut a piece of acid-free paper to fit your frame or shadow box. Arrange the pressed Scabiosa on this paper to create a design or pattern.
- Secure the Flowers: If needed, use a hot glue gun to lightly adhere the Scabiosa to the backing paper. This will prevent them from shifting.
- Frame the Art: Place the decorated paper into your frame or shadow box. Secure it and hang it as a piece of floral art.
4.2 Scabiosa-Infused Candles
4.2.1 Materials Needed
- Dried Scabiosa blooms
- Candle wax (soy, beeswax, or paraffin)
- Candle wick
- Candle mold or jar
- Double boiler or microwave-safe container
- Hot glue gun (optional)
4.2.2 Instructions
- Prepare the Mold: If using a mold, ensure it is clean and dry. If using a jar, secure the wick at the bottom using a hot glue gun.
- Melt the Wax: Use a double boiler or microwave to melt the candle wax. Stir occasionally until fully melted.
- Add Scabiosa: Before pouring the wax, place dried Scabiosa blooms into the mold or jar. Arrange them as desired.
- Pour the Wax: Slowly pour the melted wax over the Scabiosa. Hold the wick in place to ensure it remains centered.
- Allow to Set: Let the candle cool and harden completely. Trim the wick to the desired length before use.
4.3 Scabiosa in Table Settings
4.3.1 Materials Needed
- Dried Scabiosa blooms
- Table runner or placemats
- Vases or small containers
- Additional table décor (candles, napkins)
4.3.2 Instructions
- Create a Centerpiece: Arrange dried Scabiosa in vases or small containers to use as a centerpiece for your table.
- Incorporate into Table Settings: Place small arrangements of Scabiosa along the table runner or placemats. You can also use individual blooms to decorate place settings or napkins.
- Enhance the Look: Combine the Scabiosa with complementary table décor, such as candles, tableware, and napkins. Create a cohesive theme that ties together the entire table setting.
4.4 Scabiosa Terrariums
4.4.1 Materials Needed
- Dried Scabiosa blooms
- Glass terrarium or jar
- Decorative stones or gravel
- Soil or moss
- Additional dried elements (e.g., moss, small branches)
4.4.2 Instructions
- Prepare the Terrarium: Clean the glass terrarium or jar. Add a layer of decorative stones or gravel at the bottom for drainage.
- Add Soil or Moss: Place a layer of soil or moss over the stones. This will provide a base for the Scabiosa and other elements.
- Arrange the Scabiosa: Position the dried Scabiosa inside the terrarium, arranging them with other dried elements for visual interest.
- Finish the Display: Add any additional decorative touches, such as small branches or other dried flowers. Close the terrarium and place it in a prominent location.
5. Creative Uses for Leftover Scabiosa
5.1 Scabiosa Potpourri
5.1.1 Materials Needed
- Leftover dried Scabiosa blooms
- Essential oils (optional)
- Potpourri container
5.1.2 Instructions
- Prepare the Scabiosa: Gather any leftover dried Scabiosa blooms and break them into smaller pieces if necessary.
- Add Fragrance: For added scent, you can mix essential oils with the Scabiosa. Add a few drops to the flowers and mix gently.
- Create the Potpourri: Place the Scabiosa in a potpourri container. You can mix it with other dried flowers or elements for a richer fragrance.
- Display: Position the potpourri in various rooms to provide a subtle, natural fragrance.
5.2 Scabiosa Bookmark
5.2.1 Materials Needed
- Dried Scabiosa blooms
- Bookmark base (cardstock or laminated paper)
- Hot glue gun
- Scissors
5.2.2 Instructions
- Prepare the Bookmark Base: Cut a piece of cardstock or laminated paper into the shape of a bookmark.
- Arrange the Scabiosa: Position dried Scabiosa blooms on the bookmark base. Plan the design and placement.
- Attach the Scabiosa: Use a hot glue gun to adhere the Scabiosa to the bookmark base. Press firmly to ensure a secure attachment.
- Finish the Bookmark: Allow the glue to dry. Your Scabiosa bookmark is ready for use or gifting.
6. Tips for Working with Dried Scabiosa
6.1 Handling
- Gentle Touch: Dried Scabiosa can be delicate. Handle with care to avoid crushing or damaging the blooms.
6.2 Storage
- Keep Dry: Store dried Scabiosa in a cool, dry place to prevent moisture damage.
6.3 Color Preservation
- Avoid Sunlight: To prevent fading, keep dried Scabiosa out of direct sunlight.
7. Conclusion
Dried Scabiosa offers endless possibilities for DIY projects, from creating elegant wreaths and captivating wall art to charming table centerpieces and garlands. Its unique texture and color make it a versatile choice for enhancing home décor. By following the detailed instructions and design tips provided, you can create beautiful, personalized decorations that showcase the timeless beauty of dried Scabiosa. Whether you're a seasoned crafter or a DIY enthusiast looking to explore new creative avenues, dried Scabiosa provides an excellent medium for personal expression and artistic experimentation.


