Introduction
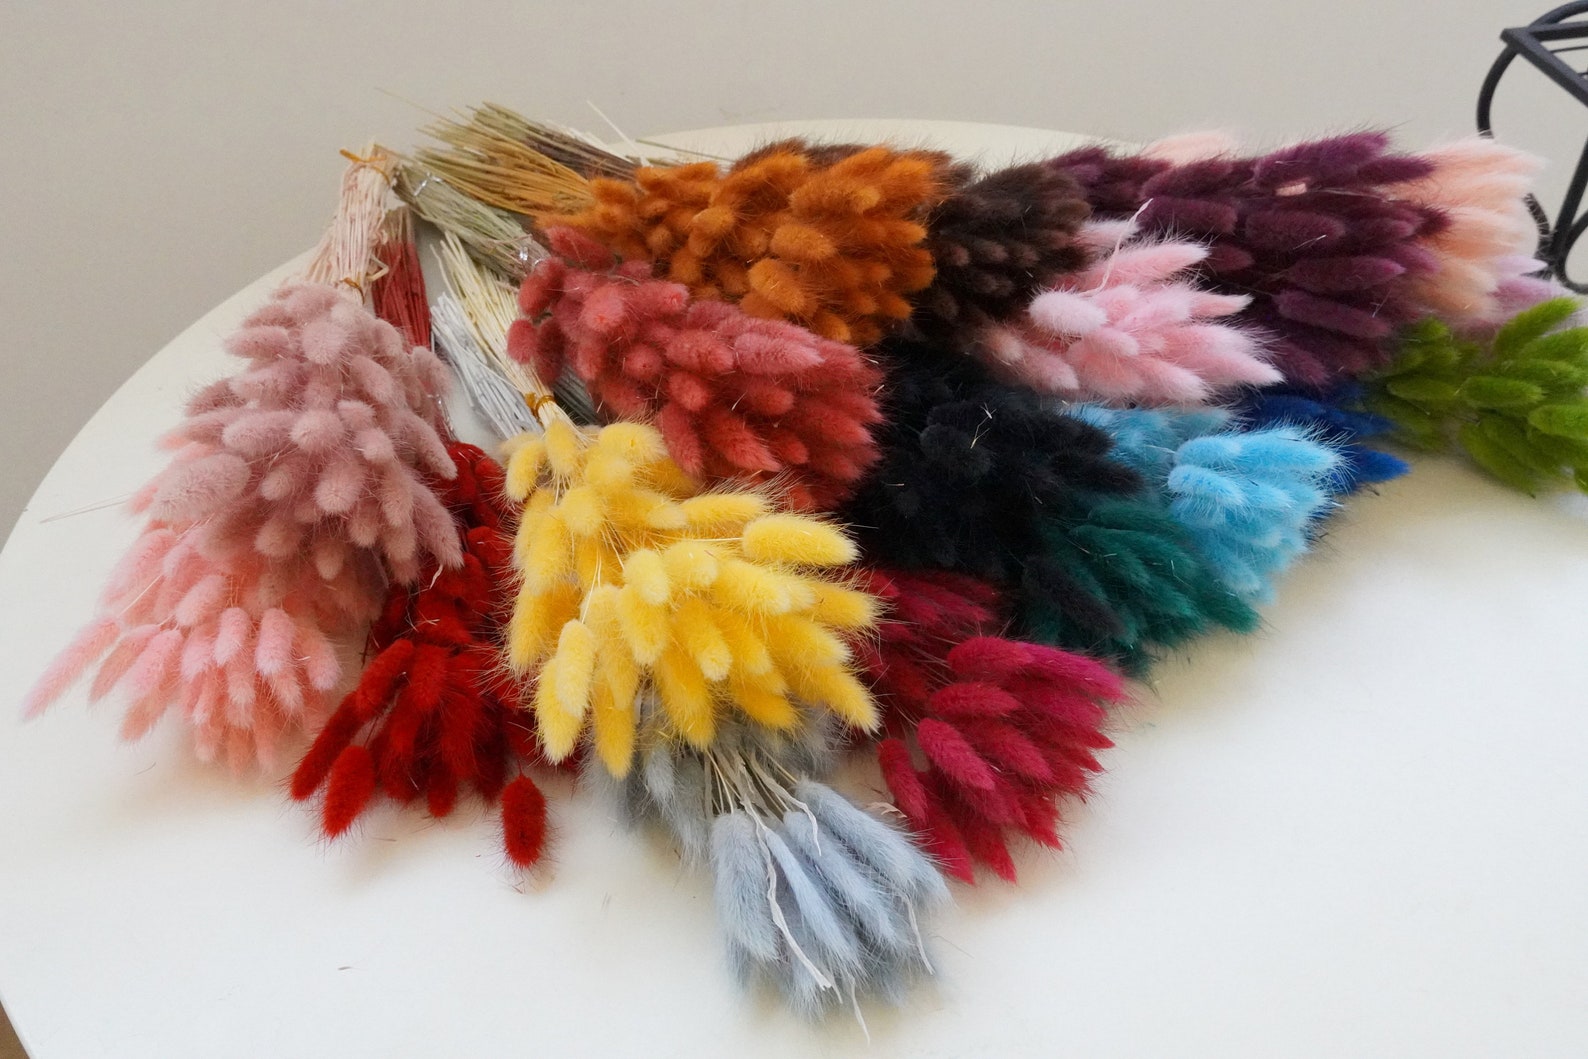
Dried bunny tails (Lagurus ovatus) are a popular choice in floral arrangements and home decor due to their soft, fluffy texture and elegant appearance. While their natural beige color complements many design styles, adding color to these delicate plants can bring a vibrant, customized touch to any project. In this comprehensive guide, we'll explore the various techniques for coloring and dyeing dried bunny tails, discuss the materials you'll need, and offer tips on how to achieve the best results.
1. Understanding Dried Bunny Tails
Before diving into the dyeing process, it's essential to understand the nature of dried bunny tails. These ornamental grasses are known for their durability and versatility, making them ideal for dyeing. The soft, fluffy heads of the bunny tails are delicate, so it’s crucial to handle them with care throughout the dyeing process to preserve their shape and texture.
2. Choosing the Right Dye for Dried Bunny Tails
There are several types of dyes you can use to color dried bunny tails, each with its advantages and potential challenges:
- Fabric Dye: Often used for dyeing natural fibers like cotton and wool, fabric dye can also be effective for coloring dried bunny tails. Fabric dyes come in a wide range of colors and can be easily mixed to create custom shades.
- Spray Paint: If you're looking for a quick and easy way to add color to your bunny tails, spray paint is a great option. It provides even coverage and is available in numerous colors and finishes, including matte, glossy, and metallic.
- Natural Dyes: For an eco-friendly approach, you can use natural dyes made from plants, fruits, or vegetables. Although natural dyes tend to produce softer, more muted colors, they offer a unique, organic look.
- Acrylic Paint: While not as common as other methods, acrylic paint diluted with water can be used to dye bunny tails. This method allows for precise color control but requires more time and care to apply evenly.
3. Preparing Your Dried Bunny Tails
Proper preparation is key to achieving a uniform and long-lasting color. Here’s how to prepare your dried bunny tails before dyeing:
- Clean the Bunny Tails: Gently shake or brush off any dust or debris from the bunny tails. You can use a soft brush or compressed air to remove any particles lodged in the fluffy heads.
- Moisten the Bunny Tails (Optional): If using a liquid dye, you may want to slightly dampen the bunny tails with water. This helps the dye absorb more evenly, reducing the risk of streaks or blotches.
- Protect Your Workspace: Dyeing can be messy, so it’s essential to cover your workspace with newspaper or plastic sheeting. Wear gloves to protect your hands from staining, and consider using an apron or old clothes.
4. Dyeing Techniques for Dried Bunny Tails
Depending on the dye type you choose, there are different methods to apply the color to your dried bunny tails:
- Immersion Dyeing (for Fabric or Natural Dyes):
- Prepare the dye bath according to the instructions on the dye package. Ensure the dye is fully dissolved in water to prevent uneven coloring.
- Submerge the bunny tails in the dye bath, ensuring they are fully covered. Stir gently to promote even dye distribution.
- Leave the bunny tails in the dye bath for the recommended time, usually between 15 to 30 minutes, depending on the desired intensity of the color.
- Remove the bunny tails and rinse them under cold water until the water runs clear. Lay them flat on a drying rack or hang them upside down to dry completely.
- Spray Dyeing (for Spray Paint):
- Place the bunny tails on a flat surface or hang them in a well-ventilated area.
- Shake the spray paint can well and apply a light, even coat to the bunny tails from about 12 inches away. Avoid applying too much paint at once, as this can weigh down the fluffy heads.
- Allow the paint to dry for about 30 minutes before applying additional coats if a deeper color is desired. Multiple light coats will give a better finish than one heavy coat.
- Once you’re satisfied with the color, let the bunny tails dry completely.
- Brushing (for Acrylic Paint):
- Dilute the acrylic paint with water to create a thin, watery consistency.
- Use a soft brush to apply the paint mixture to the bunny tails, starting from the base and working towards the tip. The diluted paint will soak into the bunny tails, coloring them without clumping or stiffening the fibers.
- Repeat the process until you achieve the desired color intensity, allowing the bunny tails to dry between coats.
- Once fully dry, gently fluff the bunny tails to restore their soft texture.
5. Drying and Setting the Color
After dyeing your bunny tails, it's crucial to dry them properly to set the color and ensure they maintain their shape:
- Air Drying: The most common method, air drying, involves hanging the bunny tails upside down in a well-ventilated area. This helps them retain their shape while drying. Depending on the dye and humidity levels, drying can take anywhere from a few hours to a couple of days.
- Using a Hair Dryer: If you're in a hurry, you can use a hairdryer on a low, cool setting to speed up the drying process. Hold the dryer at least 12 inches away from the bunny tails to prevent damage.
- Avoiding Sunlight: Keep the bunny tails out of direct sunlight while drying to prevent the color from fading. Once dry, store them in a cool, dark place if you’re not using them immediately.
6. Creative Uses for Colored Dried Bunny Tails
Now that your bunny tails are beautifully colored, it’s time to incorporate them into your decor:
- Bouquets and Floral Arrangements: Use colored bunny tails to add texture and visual interest to bouquets, centerpieces, or wreaths. Pair them with other dried flowers, fresh blooms, or greenery for a stunning contrast.
- Home Decor: Display your colored bunny tails in vases or decorative jars around your home. Their vibrant hues can brighten up any room and complement a variety of decor styles, from modern to boho.
- Craft Projects: Colored bunny tails are perfect for DIY projects like wall hangings, garlands, or even gift wrapping. Their unique texture and color make them a versatile crafting material.
- Event Decor: Whether it’s a wedding, birthday, or holiday celebration, colored bunny tails can be used to enhance the theme and ambiance. Consider using them in table settings, as part of the ceremony backdrop, or in party favors.
7. Tips for Long-Lasting Color
To ensure the vibrant colors of your dyed bunny tails last, follow these tips:
- Avoid Direct Sunlight: Prolonged exposure to sunlight can fade the colors. Display your bunny tails in areas that receive indirect light.
- Keep Away from Moisture: Moisture can cause the dye to run or the bunny tails to lose their shape. Ensure they are kept in a dry environment.
- Handle with Care: Dried bunny tails are delicate, and rough handling can cause them to shed or break. Always handle them gently, especially when arranging or moving them.
Conclusion
Coloring and dyeing dried bunny tails is a creative way to personalize your floral arrangements and home decor. With the right techniques and care, you can achieve beautiful, long-lasting results that add a unique touch to any space. Whether you choose to use fabric dye, spray paint, or natural dyes, the process is simple and rewarding. So, gather your materials, choose your favorite colors, and start transforming your dried bunny tails into vibrant decor pieces that reflect your style and creativity.


